


Sadly, for many of us hash is not always the easiest thing to get our hands on. So learn how to make the best hash yourself.
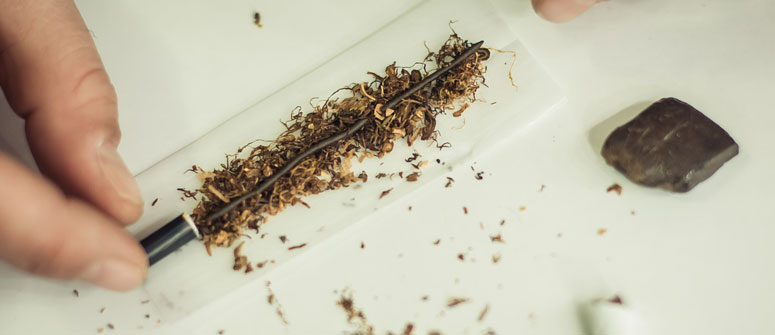
Hash is a type of cannabis extract made by separating the trichomes from the cannabis plant.
Trichomes are tiny, crystal-like particles found all over the cannabis plant, especially on the flowers. These particles contain the highest concentration of cannabinoids such as THC and CBD, as well as the terpenes that give the plant its distinct aroma.
Hash is made by separating these trichomes from the buds, leaves, and stems of the plant, and heating/pressing them to create a powerful, concentrated form of cannabis.
It usually comes in pressed blocks that vary in colour; higher quality hash will usually be golden-brown, while poorer quality hash will be slightly green due to the fact that it contains more plant matter.
HOW TO MAKE HASH AT HOME
Hash is made by separating trichomes from dried cannabis trimmings. The separated trichomes will form a fine powder (commonly referred to as kief), which is then pressed and heated (optional) into a block to make hash.
Below we’ll show you the 5 popular ways of making hash. Remember that the entire plant contains trichomes, so feel free to use everything from buds to leaves and stems.
METHOD 1: HAND-ROLLING

This is arguably the simplest way to make hash and requires virtually no equipment. It is also one of the most traditional methods of making hash and is still practiced in some areas of India and Nepal.
However, this is a time consuming process that produces small yields. So, if you set out to make hash using this method, prepare yourself for a hard day's work.
You’ll need:
- Non-dried cannabis buds. Do not use dried cannabis trimmings.
- Very clean hands.
- Before you get started, make sure to clean your hands. For the most organic results possible, use non-residual, non-scented hand soap.
- Take a cannabis bud in your hand and be sure to remove any leaves or stems.
- Place the bud in between your two palms and gently begin rolling the bud in a circular motion. Do not apply too much pressure to the bud to avoid contaminating your hash with plant particles.
- You should begin to see a thick, black resin forming on the insides of your hands and fingers. This is essentially hash or charas. Scrape this hash onto a clean surface and press it together to create a small block or ball.
METHOD 2: DRY SIFTING

This is one of the easiest and most popular forms of making hash. It involves sifting cannabis trimmings through a fine sieve in order to create a highly potent kief which is later pressed into a block.
For best results, try freezing your cannabis in a ziplock bag overnight to make it easier to separate the trichomes from the plant material.
You’ll need:
- Cannabis trimmings
- Silkscreen
- Baking paper
- A credit card
- Place a sheet of baking paper on a clean surface, such as a your kitchen table. The sheet of paper should be slightly larger than your silkscreen in order to catch the
- Place your silkscreen above the piece of baking paper. Next, place your cannabis trimmings on top of the silkscreen, making sure to break apart any large pieces.
- Use your hands to gently move the trimmings around the silkscreen to help separate the trichomes from the plant material. You should see a small amount of kief forming on the baking paper beneath the screen.
- Keep moving the trimmings around the screen till the kief beneath the sieve amounts to roughly 10-20% of the total amount of trimmings you used. For example, if you used 100g of trimmings, you should be looking to create roughly 10g of kief.
- Once you’re done sifting your trimmings, it’s time to collect your kief and press it. We recommend using a credit card to form a nice pile on the sheet of baking paper and simply pressing it into a thin hash block.
METHOD 3: BLENDING

This is another simple way to make hash in your home using only a bunch of simple household items.
You’ll need:
- Cannabis trimmings
- Ice water
- A blender
- Silkscreen
- A coffee filter
- An extra large glass jar
- Place your trimmings in a blender together with enough water to cover them and plenty of ice. Blend for roughly one minute to create a thick, frothy mixture.
- Drain the mixture through the silkscreen into the glass jar. Allow the mixture to settle for roughly 30 minutes.
- You should see a small amount of sediment at the bottom of the jar. This is essentially hash.
- Pour off roughly 2/3 of the water inside the jar. Be sure to pour slowly to avoid losing any of the hash at the bottom.
- Fill the jar to the top with more ice water and allow the mixture to settle for another 3 minutes. Once the mixture has settled, repeat steps 4 and 5 once more before moving on to step 7. This will help to separate as much plant material from your hash as possible.
- Drain off as much water from your jar as possible without losing any of the hash. Then strain the remaining mixture through the coffee filter and squeeze gently to remove any excess water.
- The remaining damp, cold mass is hash. Now all you need to do is dry it and enjoy it in a joint or bong.
METHOD 4: USING BUBBLE BAGS

This is a relatively new method of creating hash and requires some specialised equipment. However, it is an extremely efficient method and can produce large yields.
You’ll need:
- Cannabis mesh bags (such as the Ice-O-Lator, which come with different sized mesh)
- Cannabis trimmings
- Ice water
- A wooden spoon
- 2 buckets
- Place your cannabis trim in a bucket with plenty of ice (the more the better). Next, add enough water to fully submerge the cannabis.
- Stir the mixture for about 15 minutes. The cold water will make the trichomes brittle, while the slight agitation will allow them to break off into the water.
- Set up your mesh bags in the other bucket. The Ice-O-Lator bags come in 4 different sizes. Place them inside the bucket, curling the tops of the bags over the edge of the bucket and securing them. The first bag you put inside the bucket in ascending order (starting with the finest mesh).
- Carefully pour the cannabis mixture into the bucket with the mesh bags. Allow the mixture to sit and drain for about 15 minutes.
- Remove the first mesh bag from the bucket. Hold it above the bucket and pour more ice water over the mixture to wash out any remaining trichomes. Shake the bag slightly, allow it to drain, and then put it aside.
- Repeat this process with each bag. All the subsequent bags will contain hash of varying degrees of quality; the highest quality hash will be in the last bag you remove (the finest bag). The subsequent bags will contain a hash of slightly lower quality.
- Remove the hash from each bag and allow it to dry separately on a non-stick surface. Do not mix the different qualities of hash. Once dry, press each pile of hash into a ball or block, and enjoy.
METHOD 5: USING A MECHANICAL DRUM

This is by far the most professional method for creating hash. Mechanical drums work on the same principles as the dry sifting method, but the entire process is automated.
The drum is essentially just one big silkscreen that spins when turned on, causing the trichomes to separate from the plant material
However, a pollinator drum used for this kind of operation is expensive and can easily cost over €350.
You’ll need:
- Cannabis trim, preferably frozen
- A mechanical drum (Pollinator)
Simply place your trimmings inside the drum and hit the on switch. The drum will spin, causing the cannabis to rub against its silkscreen to create highly potent kief.
TURNING KIEF INTO HASH

Some of the methods we looked at above (such as the dry screening and mechanical drum methods) simply create kief. There are two ways to turn this kief into hash blocks.
The first relies on pure force. Simply load your kief into a kief press and press it into a nice, firm block (some kief presses suggest letting leaving your kief in the press for up to a week).
If you don’t have a hash press and only want to process a small amount of kief, you can also wrap it in baking paper and press it together firmly with your fingers.
The second method of processing kief relies on both force and heat. The process is a little longer, so we’ve outlined it step by step below.
1. Wrap your kief in cellophane to create a firm, tight and, most importantly, waterproof package.
2. Wrap your sealed cellophane package in wet newspaper and place it inside an oven preheated to 160°C for 10 minutes.
3. Take the package out of the oven and place it on a heatproof surface. Roll it gently and evenly using a rolling pin.
4. Wet the entire package with warm tap water, put it back in the oven for another 10 minutes. You can repeat this process multiple times to create smoother, higher-quality hash.
5. Once you’re finished heating and pressing your hash, place the package in the fridge overnight to cool and settle. Then, sit back and enjoy your very own homemade hash in a joint or bong.
So, there you have it; a step-by-step guide to making high-quality hash in your home. All of the methods we looked at have their pros and cons, which could be discussed in a whole seperate article.
We suggest experimenting with a few different methods and choosing whichever works best for you.
Happy smoking!