


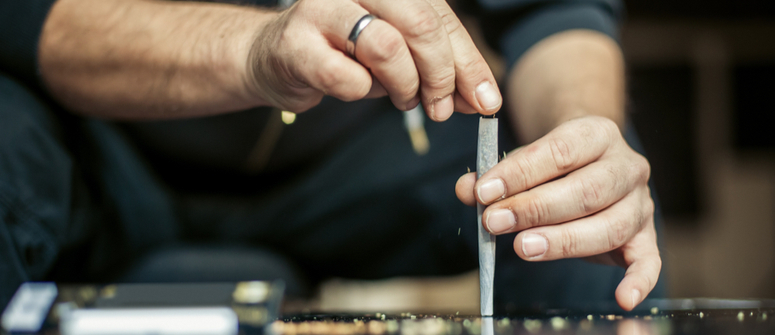
Being able to roll a joint puts you in a special class of stoner. When your friends want to smoke weed without fiddling with a bong, you can come to the rescue! Even when you don't have friends around, there's nothing wrong with rolling joints for yourself. We'll detail everything you need, and show you exactly how the perfect joint comes together.
ering the art of how to roll a joint is an essential skill for any cannabis enthusiast. This guide offers a comprehensive look at the process of rolling up the ideal joint, from gathering materials to making a filter tip and evenly distributing cannabis.
We will begin by discussing the materials needed and creating a filter tip for your joint. Next, we'll dive into distributing cannabis evenly across your rolling paper, ensuring a smooth and consistent burn throughout.
You'll then discover how to roll your joint into a cone shape before packing it properly for optimal airflow. After sealing the end securely, we will discuss lighting techniques that promote an even burn and maximize flavor.
Finally, we will cover storing and transporting your perfectly rolled joints safely so they maintain their quality until you're ready to enjoy them. By following these simple steps outlined in our step-by-step guide on how to roll a joint, you'll be well on your way towards mastering one of the most popular ways of consuming cannabis.
Table of Contents:
- Materials Needed
- Rolling Papers
- Cannabis Strain Selection & Preparation
- Optional: Rolling Tray & Joint Roller
- Creating a Filter Tip
- Distributing Cannabis Evenly
- Rolling into a Cone Shape
- Packing the Joint
- Sealing the End
- Lighting Properly
- Storing and Transporting Safely
- Storing and Transporting Safely
- Conclusion
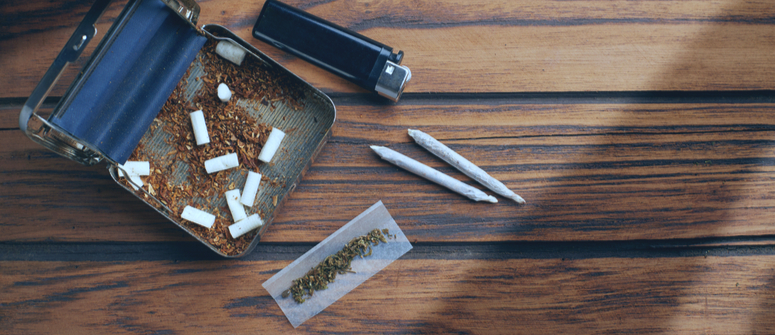
Materials Needed
Welcome to the first step of rolling a perfect joint. Before we begin, make sure to gather the required items needed for a successful joint rolling session. Having everything ready will ensure a smooth and enjoyable experience.
Rolling Papers
Rolling papers are an essential part of any joint. They come in various sizes, flavors, and materials such as hemp or rice paper. Choose your preferred type based on personal preferences and desired smoking experience.
Hemp Rolling Papers:
- Eco-friendly option made from natural fibers.
- Burns slowly for a longer-lasting smoke session.
- No added chemicals or bleach that could alter flavor or harm lungs.
Rice Rolling Papers:
- Made from processed rice; thin and lightweight texture.
- Burns evenly with minimal ash production.
- Natural taste allows cannabis flavors to shine through without interference from paper additives.
A filter tip, also known as a crutch, is another crucial component when rolling joints. Filter tips provide structure to your joint while preventing loose cannabis particles from entering your mouth during inhalation. You can purchase pre-made filters at most smoke shops or create one yourself using stiff paper like business cards or index cards.
Cannabis Strain Selection & Preparation
Selecting the right strain of cannabis is vital for achieving optimal results tailored to individual preferences - whether it be relaxation, focus enhancement, pain relief, or a social buzz. Explore our to find the perfect match for your needs.
Once you've chosen your desired strain, grind it using a weed grinder. This will ensure an even burn and make rolling much easier. Aim for a medium-fine consistency - not too powdery but without large chunks that could hinder airflow through the joint.
Optional: Rolling Tray & Joint Roller
A rolling tray can be helpful in keeping your workspace organized and minimizing messes during the process. While not necessary, investing in one is highly recommended if you plan on regularly rolling joints.
If you're new to joint-rolling or struggle with manual dexterity, consider purchasing a joint roller device. These handy tools simplify the process by automatically creating perfectly rolled cones every time - just add cannabis.
Now that we have all of our materials ready let's move on to creating a filter tip.
Gathering the necessary materials for rolling a joint is essential to achieving an enjoyable smoking experience. With the right supplies, creating a filter tip can be done with ease.
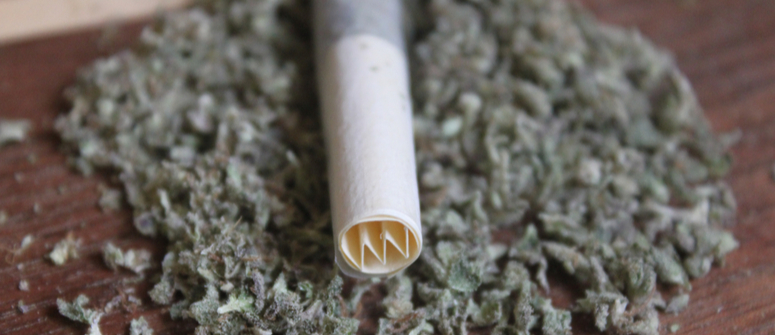
Creating a Filter Tip
Before you start rolling your joint, it's essential to create a filter tip. A filter tip, also known as a crutch or roach, serves several purposes:
- Prevents cannabis from falling out of the end.
- Makes it easier to hold and smoke without burning your fingers.
- Promotes better airflow for an enjoyable smoking experience.
To make a filter tip for your joint, follow these simple steps:
- Gather materials: You can use any type of stiff paper or cardstock. Some popular options include business cards, index cards, or specially designed pre-cut filter tips.
- Cut the material into shape: Cut a strip approximately half an inch wide and two inches long. If using pre-cut tips, simply remove one from the package.
- Fold accordion-style: Create two or three small folds at one end of the strip by folding back and forth in alternating directions (like an accordion).
- Roll tightly around folded section: Roll the remaining length of paper tightly around the folded portion until you have formed a cylinder with enough width to fit comfortably inside your joint.
- Adjust the size: If necessary, adjust the width of your filter by gently pulling or pushing on the accordion folds. This will ensure a snug fit inside your joint and help prevent any cannabis from falling out.
Now that you have created your filter tip, it's time to move on to distributing cannabis evenly in your joint. Experiment with different materials and folding techniques for a customized smoking experience tailored to your preferences.
Creating a filter tip is an important step in rolling the perfect joint. For even cannabis distribution, it's essential to grasp the right way of spreading before starting to roll.
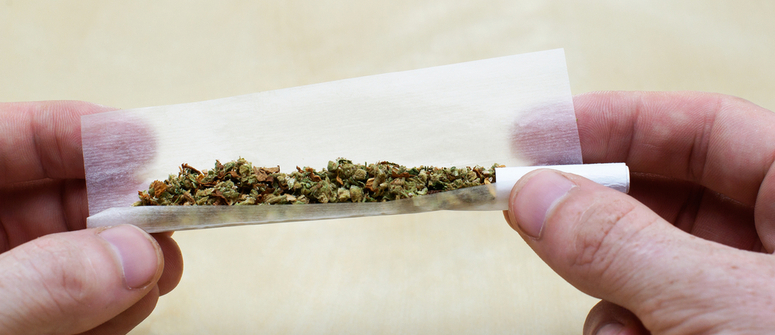
Distributing Cannabis Evenly
Now that you have your filter tip ready, it's time to focus on the most crucial aspect of rolling a perfect joint: distributing cannabis evenly. Proper distribution ensures an even burn and smooth smoking experience. Follow these steps for optimal results:
- Grind Your Cannabis: Use a quality herb grinder to break down your chosen strain into a fine consistency. This allows for better airflow within the joint and promotes even burning.
- Create a Trough in the Rolling Paper: Hold one end of the paper between your thumb and index finger while gently folding it lengthwise with the other hand, creating a trough shape.
- Add Ground Cannabis: Carefully sprinkle an even layer of ground cannabis along the crease of your rolling paper. The amount will vary depending on personal preference and desired potency but aim for around half to three-quarters of a gram as starting point.
- Add Filter Tip: Place your previously made filter tip at one end of the rolling paper where you'll begin rolling from.
- Distribute Evenly Using Fingers or Cardstock Tool: Gently use either fingertips or cardstock tool (like business cards) to spread out cannabis evenly across entire length without compressing too much. Make sure there are no clumps or empty spaces throughout. Taking time during this step is essential because uneven distribution can lead to canoeing (when only one side burns), which wastes precious cannabis material. Don't fret if you're just starting out - repetition yields results.
Distributing cannabis evenly is key to ensuring a smooth and enjoyable smoking experience. To ensure the joint rolls up nicely, it's important to roll into a cone shape for an even burn.
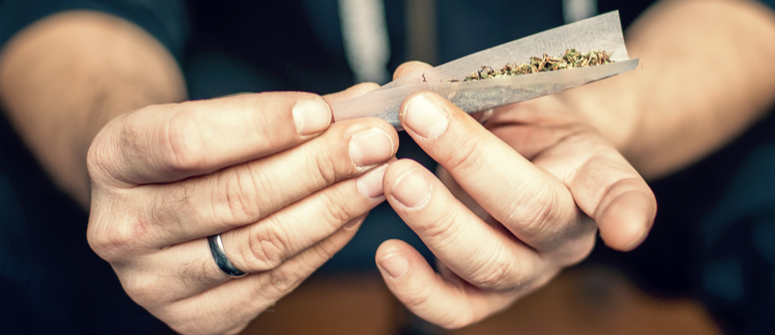
Rolling into a Cone Shape
A cone-shaped joint allows for an even burn and smooth smoking experience. Follow these steps to achieve the perfect cone:
- Pick up the rolling paper: With both hands, gently lift the edge of the rolling paper closest to you while keeping your fingers on either side of the filter tip.
- Fold over excess paper: Fold any excess paper under itself so that only enough remains above your ground cannabis mixture to wrap around it once. This will create a tight seal when rolled.
- Tuck and roll: Using your thumbs, tuck in one end of the rolling paper around your filter tip as tightly as possible without tearing or crumpling it. Continue this motion along with all sides until everything is tucked neatly inside.
- Lick and stick: Once you've achieved a nice cone shape, lick along with the adhesive strip on top of your remaining flap (usually at its opposite edge). Then press down firmly but gently onto wrapped portion below - ensuring no air pockets remain trapped between layers - sealing off loose ends completely.
Beyond traditional hand-rolling techniques, there are also various tools designed specifically for creating perfectly shaped cones every time. One popular option is using pre-rolled cones, which can be found at most smoke shops and online retailers. Simply fill the cone with your ground cannabis mixture, pack it down gently using a packing tool or pen, twist off the end, and you're good to go.
If you prefer a more hands-on approach but still want some assistance in achieving that perfect cone shape, consider investing in a joint rolling machine. These devices make it easy to roll consistently shaped joints every time by guiding your paper into an ideal cone as you tuck and roll.
Once you have rolled your joint into a cone shape, it's time to pack the weed in tightly. To ensure that the cannabis is properly packed and burns evenly, gently press down on the sides of your joint with two fingers while rotating it around.
Packing the Joint
Now that your joint is rolled into a cone shape, it's time to pack it tightly for an even and smooth smoking experience. A well-packed joint ensures proper airflow and prevents any uneven burning or "canoeing" (when one side of the joint burns faster than the other) and is essential when learning how to roll a joint. Follow these simple steps to pack your joint efficiently:
- Tap down gently: Hold the filter end of your joint between two fingers and tap it lightly against a hard surface like a table or lighter. This will help settle the cannabis evenly throughout the length of your cone-shaped masterpiece.
- Add more cannabis if needed: If you notice empty spaces after tapping down, add some more ground cannabis until you achieve a consistent density from filter to tip. Be careful not to overpack as this can restrict airflow and make it difficult to draw smoke through when lit.
- Pack with a pen or similar tool: Use something small but firm like a pen cap, chopstick, or even just your pinky finger, depending on how wide you've made your cone. Gently press down on top of the packed cannabis while holding onto the filter firmly so that everything stays in place.
If you're looking for alternative packing methods, check out our guide on different ways to pack joints using tools such as joint packing tools.
In addition to properly packing your freshly rolled joint, there are also various techniques available for those who want an extra level of customization in their smoking experience. For instance, tulip joints and cross joints are popular among cannabis enthusiasts looking to elevate their joint game.
Packing your joint is an essential step in the process of rolling a perfect cone-shaped masterpiece. Heed these guidelines to make sure your smoke sesh is seamless, even-keeled and pleasurable from start to finish.
Packing the joint properly is essential for an even burn and a smooth smoking experience. To ensure that your joint burns evenly, it's important to seal the end with care.
Sealing the End
Properly sealing your joint ensures a smooth smoking experience and prevents any unwanted spillage of cannabis. In this section, we'll discuss different techniques for sealing joints effectively.
Fold and Tuck Method
The fold and tuck method is one of the most common ways to seal a joint. To do this:
- Simply fold the excess paper at the open end of your joint inward towards the cannabis.
- Tuck in any loose edges using a pen or another small object with precision.
- Lick along the edge where you folded it down, then press gently but firmly on top to secure it in place.
This technique creates an effective seal while maintaining an even burn throughout your smoking session. Check out our guide for instructions on how to roll different types of joints if you're curious about various rolling methods.
Twist Technique
If you prefer a tighter seal or want something visually appealing, try twisting the end instead:
- Gather up all excess paper at one point above where the cannabis ends inside.
- Pinch between thumb and index finger tightly together around gathered material until no air can escape from within the chamber created by the twist motion. Make sure not too much pressure exerted when squeezing as may cause ripping if done incorrectly.
Once you have sealed the end of your joint, it is time to light it properly. Be sure to use a lighter or hemp wick for an even burn and full flavor experience.
Lighting Properly
Lighting a joint properly ensures an even burn throughout the session, providing you with a smooth smoking experience. Follow these steps to light your joint correctly:
- Choose the right lighter: Opt for a quality lighter or matches instead of cheap plastic ones that can affect the taste of your cannabis. A popular choice among cannabis enthusiasts is hemp wick, which burns at a lower temperature than traditional lighters and preserves the flavor profile of your strain. Check out our guide on the best lighters for cannabis.
- Toasting the tip: Hold the flame slightly away from the twisted end (tip) of your joint while rotating it gently in order to evenly heat all around without directly touching it with fire.
- Puff and rotate: Once toasted, place the filter end between your lips and apply gentle heat from the lighter as you take slow puffs while continuing to rotate until an ember forms.
- Avoid canoeing: Canoeing refers to when one side of a joint burns faster than another causing uneven consumption. To prevent this issue, ensure proper airflow by not packing too tightly or overstuffing; if needed adjust mid-smoke by tapping off excess ash or using tools like tweezers or paperclips.
Beyond these tips, remember that practice makes perfect - so don't be discouraged if you need some trial-and-error before mastering how to roll joints perfectly every time. For more information on different rolling techniques and customization options suited to your preferences, explore our advanced joint rolling guide.
Properly lighting your joint is essential for an enjoyable smoking experience. Storing and transporting it safely will ensure that you can enjoy the same quality of smoke every time.
Storing and Transporting Safely
Once you've successfully rolled your joint, it's essential to store and transport it safely. Proper storage ensures that the cannabis remains fresh, potent, and enjoyable for consumption. In this section, we'll provide some useful tips on how to protect your joint when it is not in use or while traveling.
Choose an Airtight Container
An airtight container is crucial for preserving the freshness of your joint. Plastic bags are not recommended as they can cause damage to the joint or allow air inside. Instead, opt for stash boxes, glass jars with rubber seals, or specialized joint tubes made from plastic or metal.
Avoid Direct Sunlight and Heat
Exposure to direct sunlight can degrade cannabinoids like THC over time due to UV radiation. Similarly, excessive heat can also affect potency by causing terpenes (the compounds responsible for aroma) to evaporate more quickly than desired. Store your joints in a cool dark place such as a drawer or cupboard away from any heat sources like radiators.
Maintain Humidity Levels within Safe Range
Ideally, cannabis should be stored at humidity levels between 55% - 62%. Too much moisture will lead to mold growth while too little may result in dryness affecting taste & smoothness of smoke upon combustion. Consider using humidity packs like Boveda or Integra Boost to maintain the ideal environment for your joints.
Keep Joints Separate from Other Cannabis Products
Separating your joints from other cannabis products is recommended to avoid flavor contamination and maintain the product's distinct qualities. This will prevent any cross-contamination of flavors and ensure that each product retains its unique characteristics.
Transporting Your Joint Safely
When taking your joint on-the-go, make sure it is securely stored in an appropriate container. A stash box, smell-proof bag, or joint tube can help protect against damage during transportation while also keeping odors contained. Additionally, be mindful of local laws regarding the possession and consumption of cannabis in public spaces - always stay informed and follow regulations accordingly.
Incorporating these storage tips into your routine will help preserve the quality of your rolled joints until you're ready to enjoy them with friends or unwind after a long day at work.
Storing and Transporting Safely
Once you have mastered the art of rolling a perfect joint, it's essential to know how to store and transport your masterpiece safely. Proper storage will ensure that your joint remains fresh, potent, and ready for consumption whenever you desire. In this section, we'll cover some simple steps to keep your joints safe during transportation and storage.
Use Airtight Containers
The first step in storing your properly rolled joint is choosing an appropriate container. Airtight containers are ideal as they prevent air from entering or escaping the container, maintaining the freshness of your cannabis. Some popular options include smell-proof bags, plastic tubes designed specifically for joints or pre-rolls sold at dispensaries, or even small mason jars with tight-fitting lids.
Avoid Direct Sunlight And Heat
Cannabis degrades when exposed to direct sunlight and heat over time; therefore, it's crucial to store your entire joint away from these elements. Keep them in a cool, dark place like a drawer or cupboard where temperature fluctuations are minimal.
Tips For Transporting Joints:
- Invest in Joint Cases: You can find various types of cases made explicitly for transporting joints on the market today - from hard-shell cases that offer protection against crushing forces to soft fabric pouches that provide discretion while carrying multiple joints.
- Maintain Discretion: When transporting cannabis products outside of legal jurisdictions (or even within), it's always best practice to maintain discretion by keeping them out-of-sight inside backpacks or purses until needed.
- Use a Rolling Tray: If you plan on rolling joints while on-the-go, consider investing in a portable rolling tray. These trays provide a flat surface for easy rolling and help contain any loose cannabis that may spill during the process.
By following these simple steps, you can ensure your perfectly rolled joint remains fresh and potent until it's time to enjoy it. Remember always to be mindful of local laws and regulations when transporting cannabis products.
Conclusion
Constructing a joint can appear daunting initially, yet with the right resources and approach, it may be an enjoyable activity. By creating a filter tip, distributing cannabis evenly, rolling into a cone shape, packing the joint tightly, sealing the end properly, lighting correctly and storing safely; you will have a perfectly rolled joint every time.
In conclusion, learning how to roll a joint is not only practical for personal use but also allows you to enjoy your preferred strain in its purest form. With practice and patience anyone can master this skill!
