


A drip irrigation system may sound complex, but it needn't be. You can make one at home for almost nothing, taking the hassle out of watering your weed. Find out how below!
Contents:
Tired of attending to each of your weed plants and only momentarily slaking their thirst? Consider setting up a drip irrigation system to do the hard work for you! Whether you’ve got an infinite budget or none at all, there are systems that can work for you, and each is effective. Not only reducing labour, but also saving water, fertiliser, and improving consistency, drip irrigation systems can give you a large amount of control over your weed grow.
How Does Drip Irrigation Work?
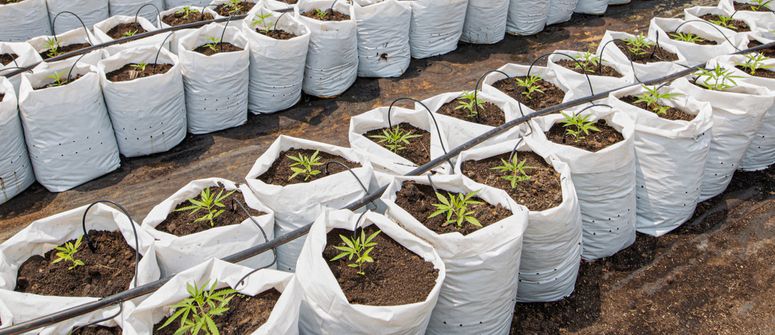
Drip irrigation is a fairly simple way to deliver a consistent, automatic, and equal supply of water to each of the weed plants in your grow. Regardless of whether you’re growing in soil or hydroponically, a drip system can work. There are a number of solutions out there, ranging from expensive, high-tech systems to simple DIY versions made with plastic bottles. So regardless of your budget, you can use a drip irrigation system in your cannabis garden.
When Was Drip Irrigation Invented?
The Fan Shengzhi shu gives the first historical mention of drip irrigation, at least in principle. Dating from the first century BCE, this was a Chinese agricultural manual from the Han Dynasty. It reports the use of clay pots, or ollas, being buried underground and filled with water. Over time, these would steadily supply water to whatever was being grown. So if you use drip irrigation on your crop, you’re also somewhat practising an ancient art.
In more recent history, modern drip irrigation was reinvented in Germany in 1860. A clay pipe was placed beneath the ground and used as a combination drainage–irrigation system. Around 60 years later, this was further developed, and the use of perforated pipe-work was introduced.
In 1959, the first experimental drip irrigation system was created in Israel by Simcha Blass. To combat the common problem of blockages in perforated pipe work, he created a system that used a larger and longer plastic emitter, harnessing friction to slow the release of water. In 1964, Netafim was created—the first drip irrigation company.
What Are the Advantages and Disadvantages of Drip Irrigation for Growing Cannabis?
As with all methods, there are advantages and disadvantages to using an automatic drip irrigation system. A few of these are specific to certain versions of such systems, but most are universal.
Ultimately, your setup will determine whether or not you opt for drip systems. If you’ve only got a couple of plants, the cost and initial effort may not pay off. If, on the other hand, you have a whole garden of plants to regularly water, a drip system may save you a huge amount of labour in the long run.
Advantages of Drip Irrigation
- Reduced labour: This is probably the main advantage. By automating the watering of your plants, you can save yourself tens of hours over the course of a single crop (depending on its size).
- Precise water distribution: Your plants will be getting an exact amount of water and nutrient solution, which makes controlling their development much easier. Likewise, each individual plant will be getting the same amount, hopefully increasing your overall yield and making for a homogeneous canopy.
- Less water loss: Due to the nature of drip irrigation, less water will be lost to evaporation, and more can be savoured by your thirsty plants.
- Healthier roots: Whether indoors or out, drip irrigation optimises humidity and moisture levels around your plants’ roots, keeping them healthy.
- Reduced risk of pests: By delivering water directly to your plants’ roots, it keeps the surrounding area and the leaves drier. This makes it a less-hospitable environment for pests, without reducing the water intake of your plants.
- Less fertiliser loss: By delivering nutrient solution directly to your plants’ roots, significantly less is lost to the wider substrate.
How Drip Irrigation Helps To Conserve Water
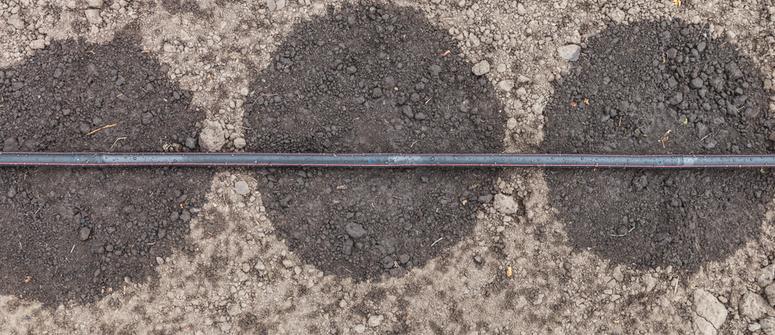
Due to the precise nature of drip irrigation, it conserves much more water than other methods, such as hand watering or flood irrigation. When you administer a large amount of water at once, you get runoff that can't be used by your plant, and much of the water evaporates before it is used.
This is increased further if it is windy. However, by delivering a small amount of water, much more of it is used, meaning that, overall, less is needed.
Disadvantages of Drip Irrigation
There are some drawbacks to drip irrigation. As with all systems, the more complex something gets, the more it can go wrong, and the harder it is to fix. So these systems, though they lighten the labour, do still require regular checking and maintenance to ensure they are working properly.
- Expensive: This is not always the case, as it can be very cheap. But a sophisticated system is likely to be a lot more expensive than a watering can or a hose!
- Potentially dangerous: Having a large coil of piping full of water can be a danger in a grow room. Not only might you trip over it, but if it split, it could wet the many electrics you’re also likely to have in there. Not a good combination. So it requires proper setup and maintenance to keep things safe.
- Freezing: More expensive systems with pumps, etc. will need to be kept from freezing. If they are not being used, they’ll need to be emptied entirely until warmer weather arrives. Your massively expensive system is little good if it’s frozen solid!
- Clogging: As pipes carry nutrient solution, which contains salts, over time these can build up, solidify, and block the perforations.
- Plastic degradation: Whether indoors or out, your system will likely be exposed to a lot of bright light. Unless you’re following the Fan Shengzi shu, your system is probably plastic and will degrade under such light. As this happens, microplastics will enter the water, your crop, and the wider water system.
Is Drip Irrigation Expensive?
If you want it to be. A proper system will incur an initial cost and subsequent maintenance costs. If you’re buying pumps and filters, these may need to be replaced or serviced—pipes will need cleaning. That being said, if you want to go eco and cheap, you can make one out of plastic bottles pilfered from your neighbour’s recycling box (ask them first). So it can also be entirely free.
Which Drip Irrigation System Is Best for Growing Cannabis in Soil?
There are a couple of different drip irrigation systems that can be used in soil grows:
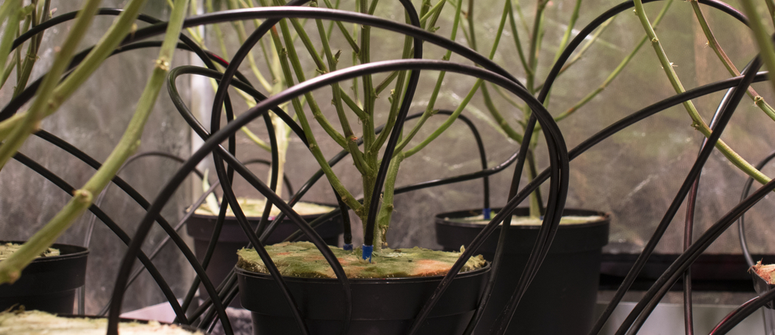
- Drip line irrigation: Popular, but potentially expensive. This system uses a continuous line running around your grow, fed with low-pressure water. Above each pot are around three holes that continually drip water and nutrients onto plants. These are particularly good for indoor grows.
- Bottle drip irrigation: This is a very cheap DIY solution, and great for beginners, especially those growing outdoors. As you might expect, it involves little else than some plastic bottles.
How To Set Up Drip Irrigation for Growing Cannabis
There are multiple ways to do this, from the incredibly simple to the very complex. Here, we’ll outline the simplest two: a simple DIY line irrigation system for indoor use, and using hanging bottles to drip-feed your plants for outdoor use.
Once you know what you’re doing, these can be adapted to your needs. For instance, it is possible to use a similar method as the bottle one, but where you bury the bottles so they deliver a subterranean supply of water.
Line Irrigation System
This is a cheap and fairly simple line irrigation system designed to water plants in an indoor grow. While not complex, it will take some effort to set up, but will greatly reward proper execution.
Likewise, due to its nature, it will require some maintenance, as it is liable to become blocked. However, if you do it well, it will take a whole load of weight off your schedule by watering your crop for you.
Materials for Line Irrigation System
- Tap: In or close to your grow room (will need to be permanently dedicated to the line irrigation system)
- Drip irrigation adapter: Includes backflow preventer, mesh filter, 25 PSI pressure regulator, and hose adapter
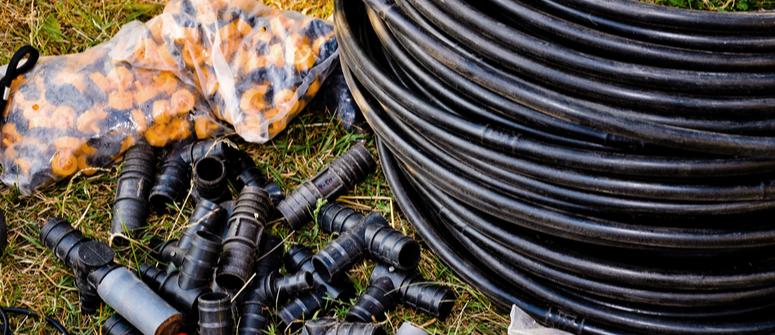
- ½" thick (1.27cm) watering line/pipe: Length will depend on how many plants you have and how they’re spaced around the room
- Pressure-compensating water drippers
- Tent stakes: To hold the line in place
- Tubing hole punch
- Fittings (optional): In larger grow rooms, a selection of T, cross, and corner line fittings might be useful to properly order and hold the pipe
Steps for Setting Up a Line Irrigation System
- Connect the adapter to the tap, and the line/pipe to the adapter.
- Work out where along your line it will pass over the plant pots, and punch three holes in each of these places.
- Install drippers. Push them into the holes you’ve made. Position the drippers so they won’t wet the body of the plant, as this could encourage pests.
- Use the tent pegs to hold the line close to the top of the soil.
- Cut your line where necessary, and attach to the fittings so it effectively reaches each plant.
- At the end of your line, cut it and plug it.
- Turn on the water and check the system. Any drippers that spray or appear blocked should be replaced.
Bottle Irrigation System
This method is unbelievably simple and potentially free. Requiring little more than plastic bottles hung from something, it’s by far the simplest irrigation system. It’s most suited to outdoor grows, though it could also be used indoors.
Perhaps the main drawback of this method is that the bottles will need to be manually refilled each day, which removes the benefit of automating the process. Nonetheless, you will still get the other advantages of a drip system watering your crop.
Materials for Bottle Irrigation System
- Plastic bottles with caps: As many as you have plants (1.5 litres is ideal, as this is roughly the amount of water adult plants need each day)
- Drill or something similar: To make holes in the sides of the bottles
- String or wire: To suspend the bottles above your plants
- Stakes: To help hang your bottles
- Scissors or knife: To cut bottles
Steps for Setting Up a Bottle Irrigation System
- Cut the bottom of the bottles off.
- Drill two holes in the side of each bottle, around 2cm from the missing bottom.
- Run a string through these two holes. You will suspend them from this.
- With the caps on, suspend them between 30–60cm above your plants, and fill with water.
- Begin to slowly open the cap. You don’t want to do this completely; just enough to get a steady drip. Experiment until you find the perfect level.
- Refill your bottles as needed.
Drip Irrigation for Growing Cannabis: Become a Pro!
It’s as simple as that! Setting up your own drip irrigation system is pretty easy, cheap, and comes with a host of benefits. That being said, if you're serious about it, while the bottle solution is probably a good starting point, you may want to move beyond it fairly quickly.
Setting up a more complex system, like a line irrigation system, isn’t too difficult if you’re a little practical and patient. Moving beyond that, there are a number of more advanced methods you can employ to get water and nutrients to your babies in the most efficient way possible.
That being said, if you’re a first-time grower, there can be a simple pleasure in going to give your plants their daily drink. It’s also a good opportunity to check how they’re getting on, and to get to know them. However you choose to water your plants, make sure you don’t neglect them!
